Saturday, October 19, 2013

Sort of a Fire Place

In our house, we do not have a fire place.  It is a bummer, especially now that little E knows what Santa Clause is, and Christmas is coming!  Last year, my friend at Sew Homegrown made an amazing Faux Fireplace (See it here!).  I was inspired to create a place to hang stockings in our home.  I did not want to spend much, so I went shopping in my own home. 

Before:


Not bad, but not "fireplacey" (that's a word . . .)

After:


Still not a "fireplace" but I feel like it it a great place to hang stockings this Christmas!  The wooden shelf hung in my parent's house for a long time, and my mom gave it to me several years ago.  I could not come up with a use for it until now.

The stained glass was a gift from my husband several years ago, and the candlesticks were from a local garage sale.  The plate was a wedding gift I have not displayed yet, and the cement balls were from a long closed junk store on the Southside.  My new favorite is this:

Last week, I went to Hartselle, AL, and was drawn into a 70% off everything going out of business sale!!!  This beautiful crewelwork was $16!  It is dated 1931.

The blue vases are featured in an earlier post (Vases Before and After).  I think they add a good punch of color.

Oh, we added a dog, Miss Pickles, last week also . . . .you can see her basket next to the dresser!

www.savvysouthernstyle.net  

Sunday, August 18, 2013

Colander Planter

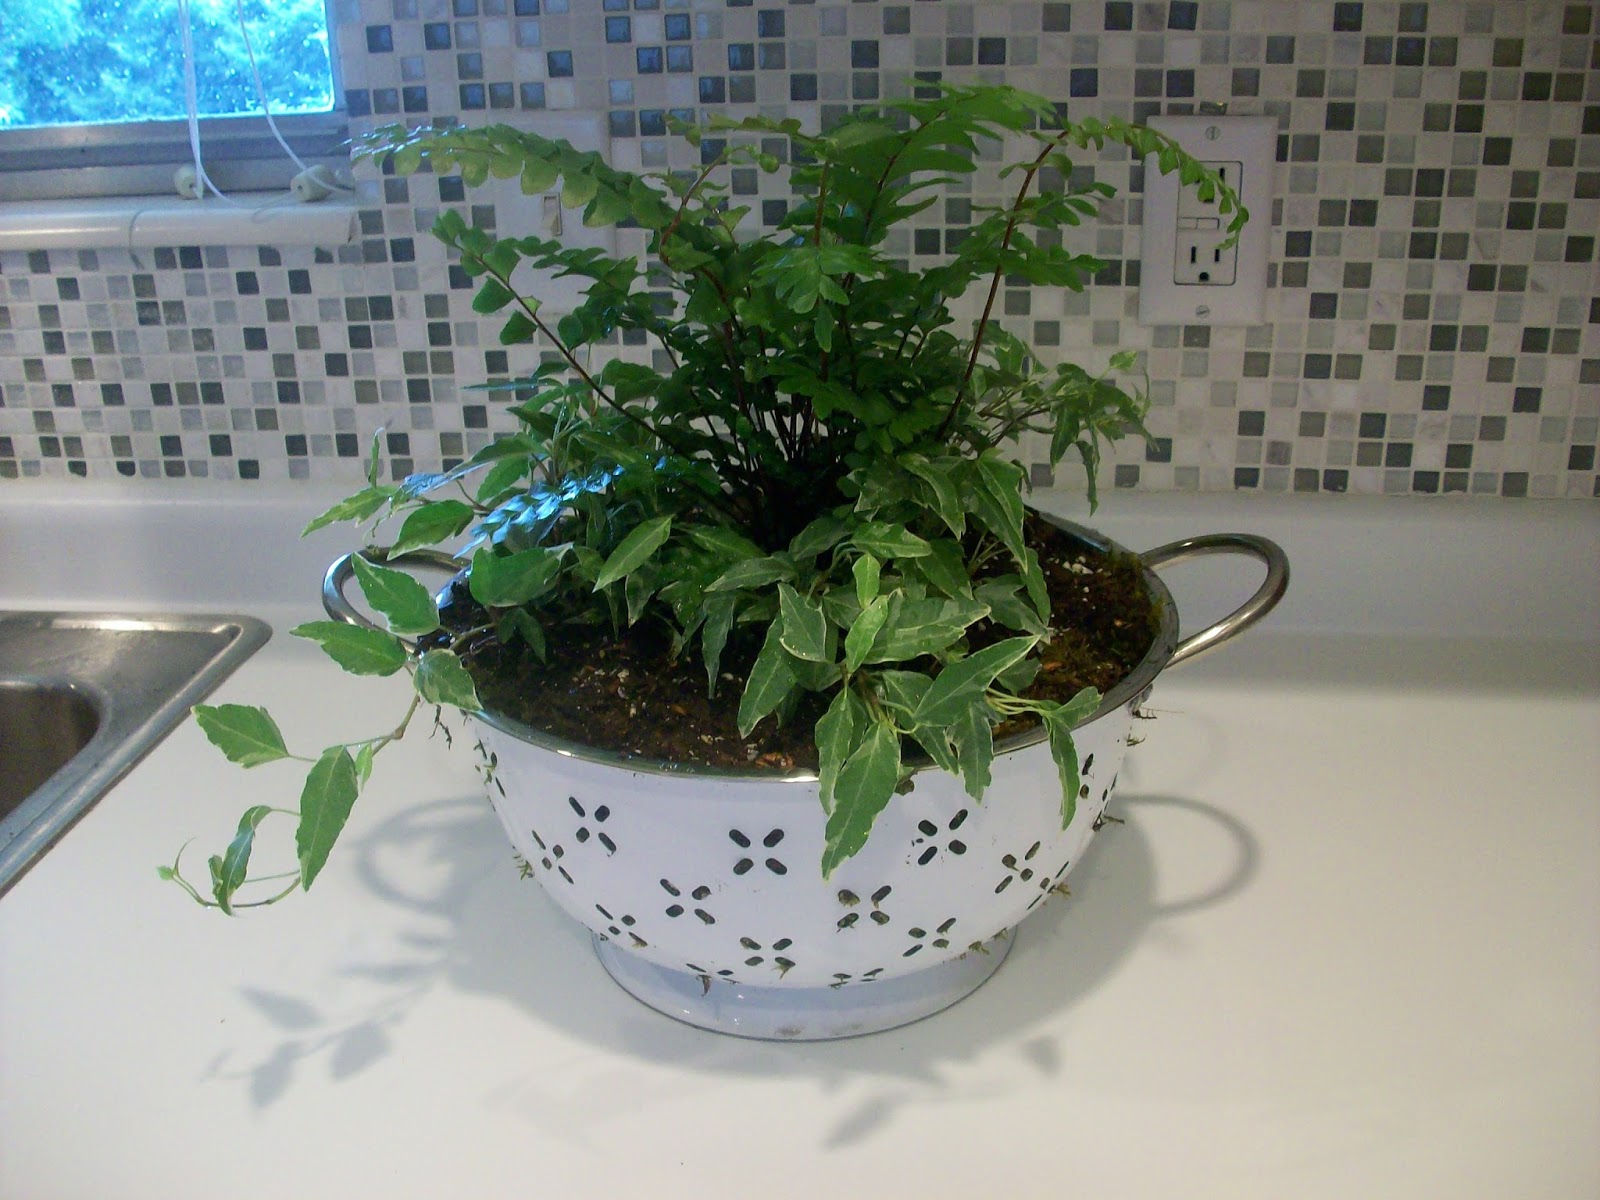
I found this pretty colander at Target on the clearance shelf!  It was exactly what I had been searching the thrift stores for.


 I needed the following supplies:


Also, you need potting soil.  Here is a list of what you need:
  • River rocks
  • Moss
  • Potting Soil
  • Any assortment of ferns/small plants
  • Colander
  • Trowel (or your hands)
I covered the bottom with river rocks, the then lined the sides with the moss.  I wanted to put something between the soil and the large open slots of the colander.   Then, fill the colander with potting soil, and place the plants where you want them!  Easy!

It probably only took 15 minutes to complete.  I put it all together in the kitchen sink (it is raining, again, outside) to minimize mess.


My planter will go on my kitchen bar.  I used one mahogany fern, and three hedra helix ivies!

Sharing with: Savvy Souther Style

Saturday, July 20, 2013

Vases Before and After


I found these beauties at the local thrift store for $1.39.  They were originally $1.39 each, but they were 50% off.  What a deal!  (But wow, they are bad!)   There is some damage, the flower is missing off the boy vase and the arm is missing off the girl vase.


One coat of primer, and they are already looking better!!!


I am pretty happy with these.  I had this turquoise blue at home already, and went with it.  I have big plans for these in my living room!  Stay tuned!


Thursday, July 18, 2013

Child's Bench


Earlier this summer, my mother's neighbor gave this bench to my mom.  Her neighbor found it in the garbage, and gave it to my mom when my daughter was playing at their house.  I cannot find my before picture . . . .

The metal was green and rusty, and the varnish was peeling off the wood which was stained lighter.  It was in great structural condition, and is very heavy.  You can find these at Lowe's and other outdoor stores all summer long.  They are about $100 new. 

I cleaned and spray painted the metal, and spent a lot of time sanding the varnish and stain off the wood.  The whole project was less than $12!!!  I used left over primer, and purchased one can satin spray paint, one small can dark stain, and one can spray polyurethane!  I put 5 coats of poly on it, since it will be in the sun and outdoors. 

Saturday, July 13, 2013

Repairing Veneer on a Painted Piece


You may remember this disaster.  The veneer clearly got wet sometime in the past and had bubbled up.  So, time to fix it!


Thanks Pinterest!  I cannot find the link now, but I saw another blog that suggested using veneer edging for repair.  I used a box cutter to cut out all of the area that was no longer attached to the wood below, it was fairly easy.  The Lowes near me did not carry iron on veneer edging, so I purchased this from Amazon.com.  The color of the veneer does not matter, because I am painting over it.  I went with a lighter color, just in case.


I just measure on the spot, and only used half of the veneer.  It very easily glued down with the iron.  The box cutter easily cut it.  Luckily, this veneer was the same depth as the original veneer, and only needed one layer.   It did shrink a tiny amount once it dried, and you can see the seems.  That is okay because:


I puttied in all the cracks anyways!  Next, I will sand the entire piece again, and onto primer.

I plan to paint it a bright white, with a blue off center stripe (thanks Classy Clutter for the paint idea).  I found some awesome patina brass drawer pulls at the Decatur Habitat for Humanity (ReStore) for $1 each.  This piece had no pulls when I found it.  Here is what it looked like when I found it: Oh So Dirty Dresser.

Thanks for stopping by!  Leave a comment if you have any creative ideas for this chest!

Saturday, June 22, 2013

Pool Noodle and the Garage Door

SO, I learned the hard way that my new car is larger than the last one I had, and this happened when the garage door was open when the back hutch of the car was also open:


Yeah, not a happy camper . . . .  Since I need to open the hutch with the garage door open, I had to figure out something.  Here is the angry, paint scratching metal:


Pool noodle from the Dollar Tree to the rescue!  All you need is a pool noodle, zip ties (small worked fine), and a knife.


(The pictures are not wonderful, but you get the idea!)


Sunday, June 16, 2013

Keyboard Frame for Father's Day


Sorry I have been gone so long!  The summer really got going.

My husband is a big nerd (and I LOVE it), and I was trying to be creative for Father's Day.  Hopefully, he will not be checking the blog before Sunday . . . .

Below are all the supplies you need:


I found 2 off white keyboards at the thrift store for $.75 each!  I wound up only needing one.  I bought a frame at Hobby Lobby at 50% off.  A thrifted frame would be perfect too, but I did not have a flat one.  Grab your hot glue gun and a butter knife, and you are set!

First, pop the keys off the board, really easy:


However, the keyboard was REALLY gross underneath, and I promptly tried to clean my own keyboard . . .


 I lined the keys up, just to see how I liked them on the frame, and I just glued them all on after that!

HAPPY FATHER'S DAY!!!